Length: 1.0 mile (1.6 km) round-trip
Elevation Gain: Approximately 200 ft (61 m)
Route Type: Out and Back
Difficulty: Easy to Moderate
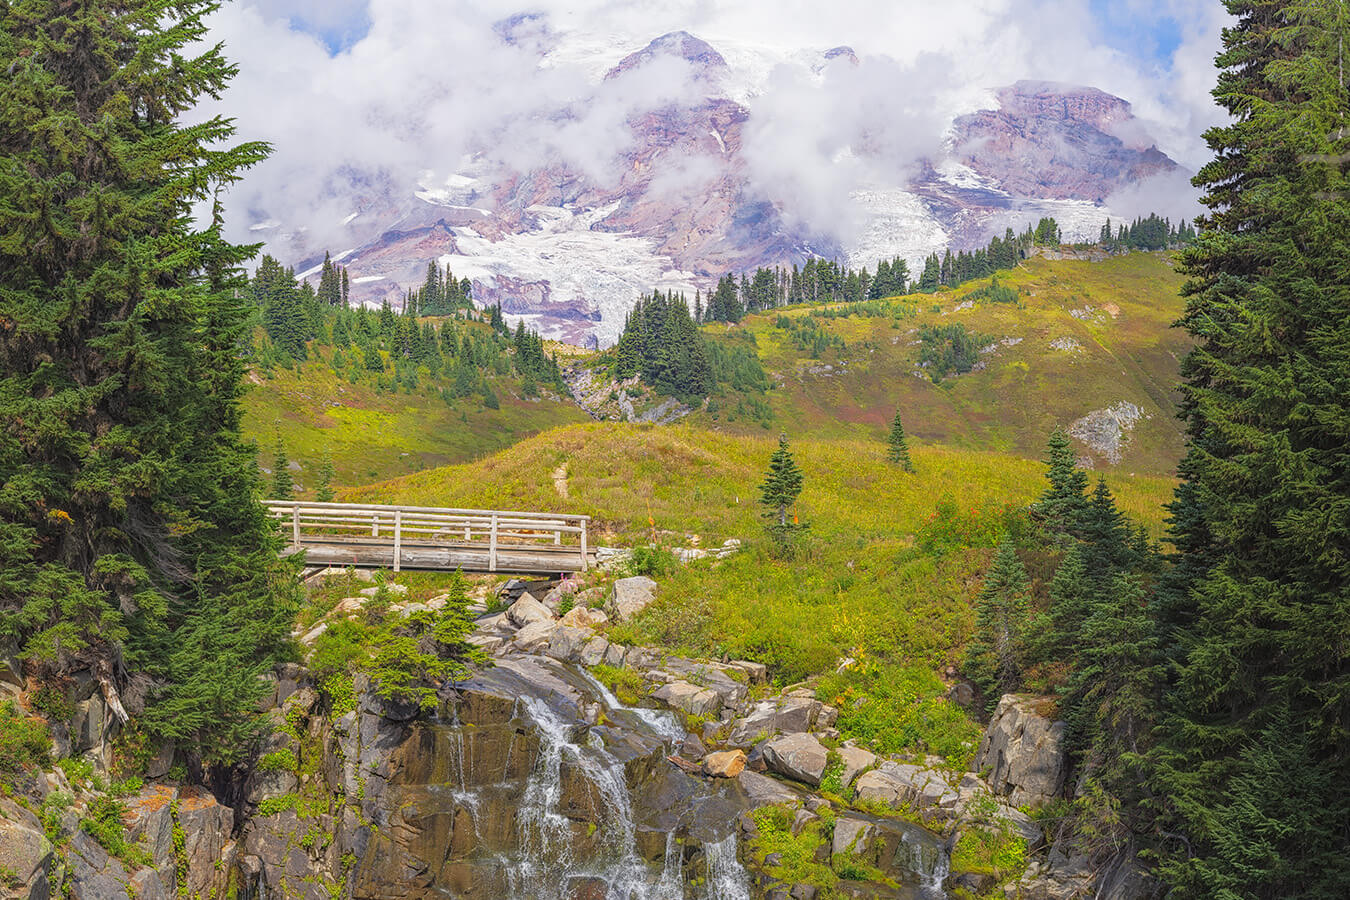
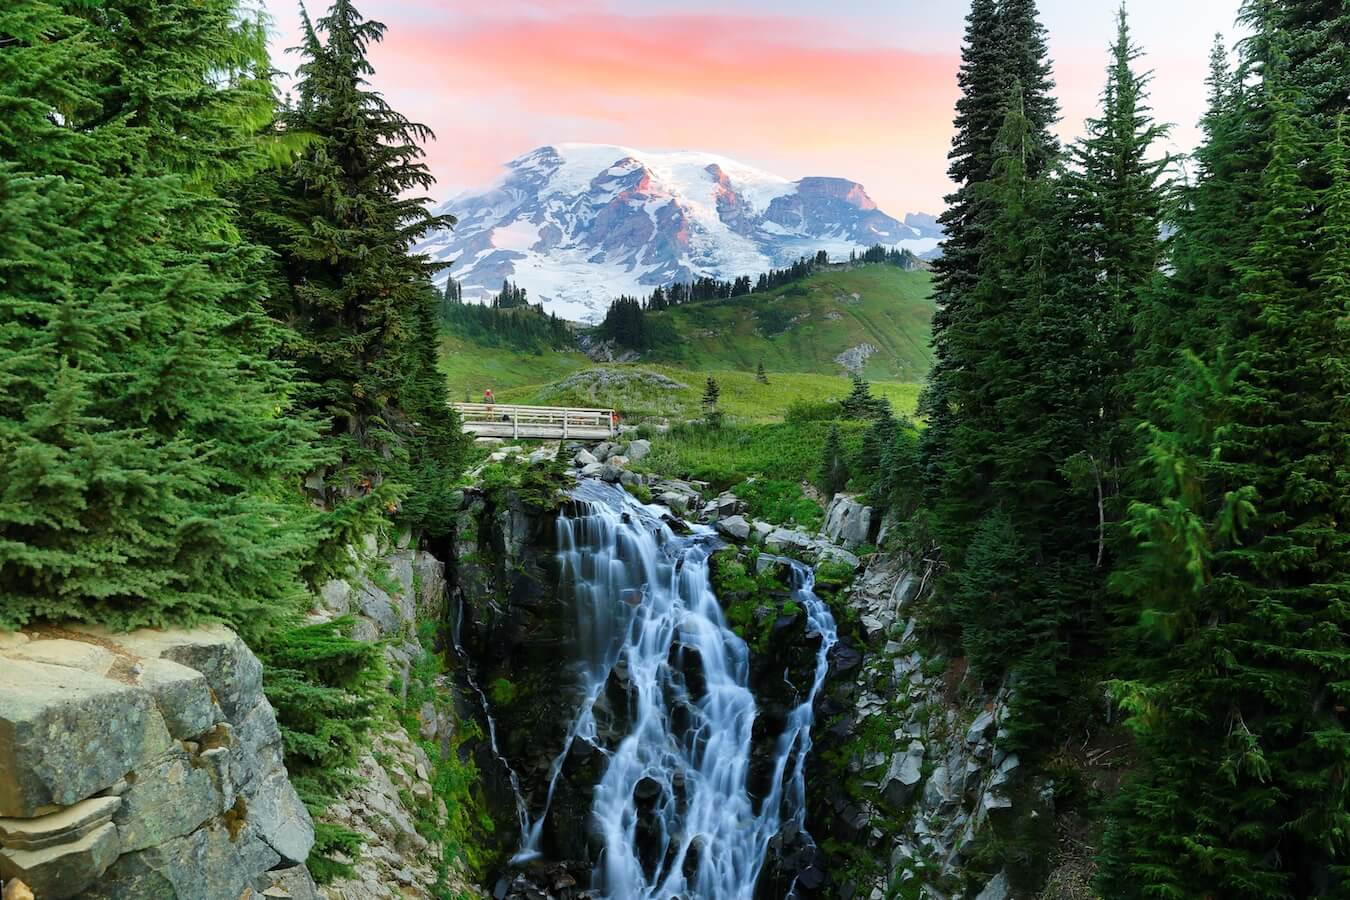
Myrtle Falls is one of the most popular and easily accessible photographic locations in Mount Rainier National Park. Located in the Paradise region on the south side of Mount Rainier, the waterfall drops into a narrow rocky gorge surrounded by beautiful subalpine meadows. On a clear day, the snow-covered peak of Mount Rainier provides a magnificent background, making this one of the most recognizable photographic compositions in the park.
The relatively short hike makes this location accessible to most visitors, although there are some steep sections along the trail. For photographers, Myrtle Falls offers an opportunity to capture a waterfall, mountain scenery, wildflowers, and changing weather conditions in a single composition.
Accessing Myrtle Falls in Mount Rainier National Park
Starting Location: Paradise upper parking lot, near the Henry M. Jackson Memorial Visitor Center
GPS (DD): 46.786270, -121.736208
Myrtle Falls is reached from the Paradise area of Mount Rainier National Park, approximately 19 miles east of the Nisqually Entrance. From the entrance, follow the road through Longmire and continue uphill to Paradise. There are large parking areas near the Henry M. Jackson Memorial Visitor Center and Paradise Inn. During the summer months, particularly on weekends, these parking lots can fill quickly. I recommend arriving early if you want to avoid the crowds.
The trail begins near the visitor center at the Paradise Meadows–Skyline Trailhead. The Skyline trail goes two different directions at the trailhead entrance. When the split happens, follow the Skyline Trail to the right, toward Myrtle Falls. The route is paved for much of the way, although there are some steep sections. Near the falls, a short, steep side path with steps leads down to the main photographic viewpoint.
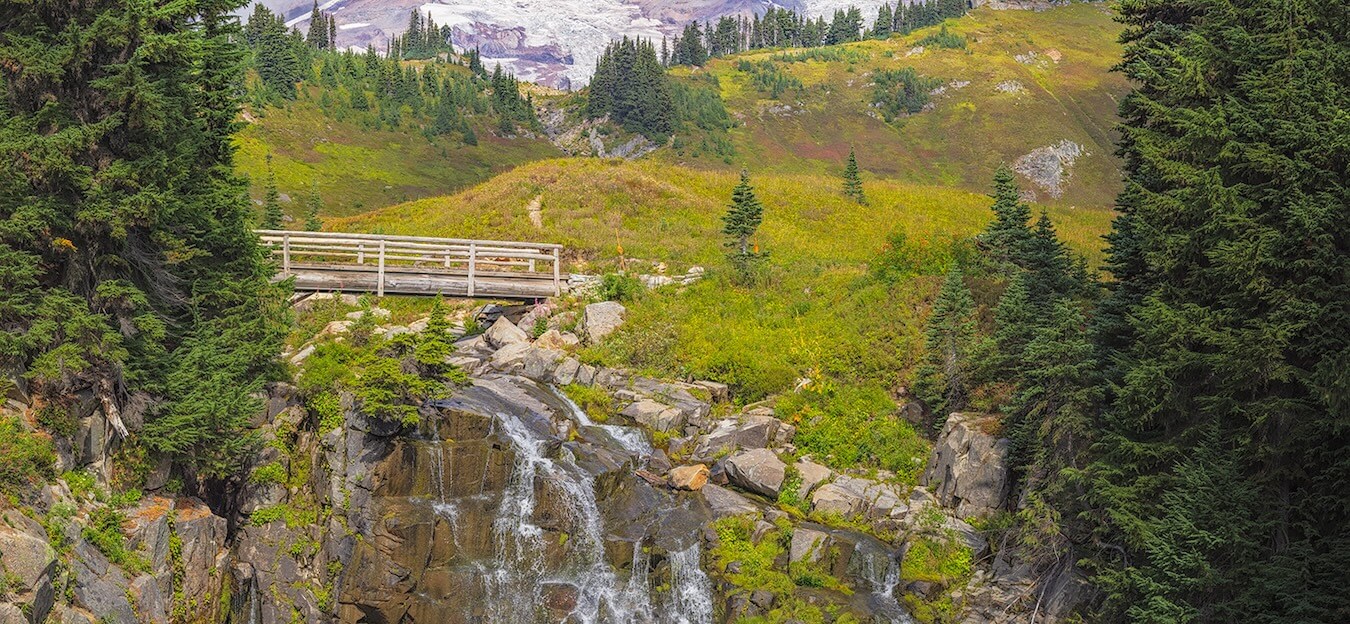
From this lower viewpoint, you can photograph Myrtle Falls with Mount Rainier rising in the background. A bridge above the waterfall provides another view, but the lower viewpoint offers the classic composition.
Hiking Trail Conditions for Myrtle Falls
Although this is a relatively short hike, don’t underestimate the elevation or the steepness of some sections. The Paradise area is more than 5,000 feet above sea level, and visitors coming from lower elevations may find the climb back to the parking lot a little tiring.
The paved portions of the trail make carrying camera equipment reasonably convenient. However, the descent to the main waterfall viewpoint requires more care, particularly if you’re carrying a tripod, panoramic head, and several lenses.
The trail passes through beautiful subalpine meadows. During the summer months, these meadows can be covered with wildflowers, providing additional photographic opportunities along the way. Be sure to stay on the established trails. The vegetation in these high-elevation meadows is fragile and can be easily damaged.
Recommended Emergency Supplies in Mt Rainier National Park
Whenever you are traveling, it is always a good idea to bring extra emergency supplies. This is especially true if you will be hiking to more remote locations during your stay. Here are some highly recommended supplies to bring with you on your journey:
- Water
- Food
- Sun Protection (sunscreen SPF 30+, hat, sunglasses)
- Insect Repellent
- First Aid Kit
- Map (NPS trail map or offline GPS app)
- Flashlight/Headlamp (with batteries)
- Emergency Shelter (space blanket or poncho)
- Whistle/Signaling Device
- Extra Clothing
- Multi-Tool or Knife
- Additional Emergency Supplies (Click here for a complete list of our recommended photography and hiking gear)
Be Prepared for Limited Cell Service
National parks often have limited or spotty cell service, so it is always helpful to have some sort of map or GPS-tracking device handy to assist with trail and road navigation. Even when you don’t think you will get lost, if the trails or roads are poorly marked, it is a possibility. Some GPS trackers, like the Garmin inReach and the Garmin inReach Mini, can also communicate your location to others. At a minimum, have a printed copy of the park maps or download them to your phone via the NPS app or website.
Best Time of Year to Visit Myrtle Falls
Myrtle Falls can be photographed during much of the summer and early fall, depending on snow conditions. July and August are generally good months for wildflowers, although snow can linger well into summer. September can offer attractive fall colors in the surrounding vegetation, along with changing weather conditions.
As with many mountain locations, the weather is often unpredictable. Mount Rainier can be completely obscured by clouds even when the surrounding landscape is relatively clear. I experienced this firsthand during our September 2025 photography trip.
My September 2025 Visit to Myrtle Falls
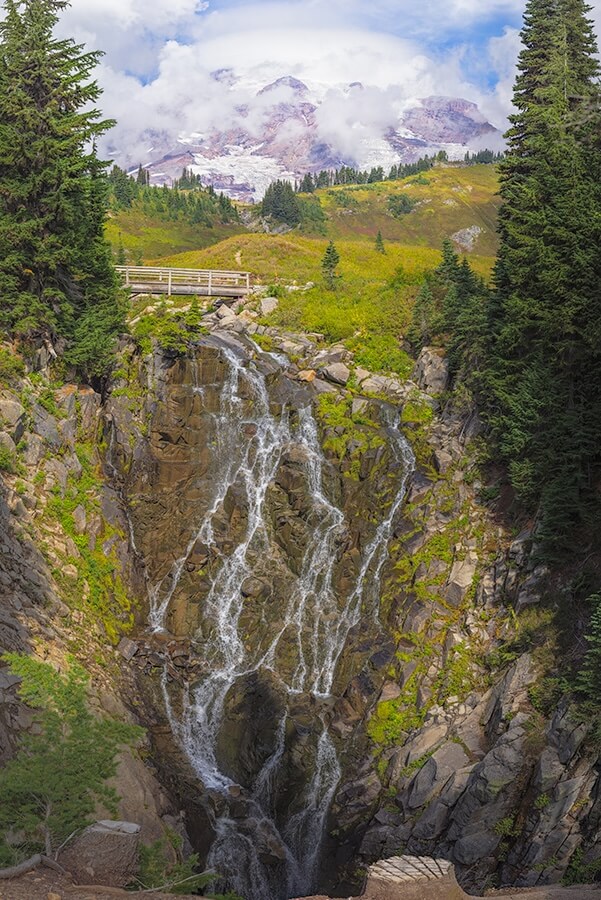
On September 9, 2025, Myrtle Falls was one of the locations I had specifically selected to photograph during our fall trip to Mount Rainier National Park. Unfortunately, fog and clouds plagued much of our visit. We never did get a completely clear view of Mount Rainier.
When I photographed Myrtle Falls, a huge lenticular cloud crowned the summit of the mountain, giving it the appearance of a UFO hovering over the peak. Lower clouds were moving across the slopes, continually changing the appearance of the scene. Although I would have preferred a clear view of the mountain, the unusual cloud formations created an interesting atmosphere that made the photograph quite different from the more familiar images of Myrtle Falls. Sometimes you simply have to work with the conditions nature provides.
Photography Tips for Myrtle Falls
The classic photograph of Myrtle Falls includes the waterfall in the foreground with Mount Rainier rising behind it. The rocky gorge, flowing water, and surrounding vegetation provide a variety of textures and colors. The mountain adds a dramatic sense of scale. A wide-angle lens is an excellent choice for capturing the entire scene. Depending on your position, focal lengths in the 16–35mm range can work well.
The waterfall also provides opportunities for experimenting with shutter speeds. A slower shutter speed can give the flowing water a smooth, silky appearance, while a faster shutter speed will preserve more of the individual water droplets and texture. I generally prefer to retain natural detail in moving water rather than completely smoothing it out. For my photograph, I took a very different approach from the conventional wide-angle composition.
Photographing Myrtle Falls at Gigapixel Resolution
My photograph of Myrtle Falls was captured using a Canon R5 and a Canon 100–400mm lens set to 200mm.
The exposure settings were:
- Aperture: f/11
- Shutter Speed: 1/1000 second
- ISO: 400
- Focal Length: 200mm
Rather than taking a single photograph, I captured a series of overlapping images using my panoramic equipment.
The scene presented an additional challenge because I wanted to maintain sharp focus throughout the photograph. With a telephoto lens, objects at different distances cannot always be rendered sharply in a single exposure.
To overcome this limitation, I used focus bracketing, capturing multiple photographs at different focus distances for many of the camera positions.
The finished panorama was assembled from 992 individual focus-bracketed exposures, which were processed into 110 focus-stacked images before being stitched together.
The final photograph contains:
- 1.77 gigapixels
- 33,295 × 53,164 pixels
- 111 × 177 inches at 300 pixels per inch
That’s approximately 9 feet 3 inches by 14 feet 9 inches at full photographic printing resolution.
The image required considerable computer processing. I used Adobe Camera Raw for initial adjustments, Helicon Focus to combine the focus-bracketed exposures, PTGui to stitch the panorama, and Adobe Photoshop for final inspection and corrections.
One of the advantages of this technique is the ability to examine small details in the landscape while retaining an exceptionally large overall image.
You can explore the completed photograph through the interactive high-resolution viewer on my website:
Myrtle Falls – Abba’s Creations Photography
Elevation and Weather Conditions at Myrtle Falls
The Paradise area is known for receiving extraordinary amounts of snowfall. Although the road to Paradise is maintained during winter, access is subject to weather conditions and periodic closures. Snow can remain on the trails well into June or July. The Myrtle Falls viewpoint can be particularly hazardous when covered with snow or ice because of the steep terrain and drop-offs around the waterfall. The National Park Service recommends avoiding the Myrtle Falls area until the snow has melted.
Even during summer, weather conditions can change rapidly. I recommend bringing a jacket and rain protection for your camera equipment, regardless of the forecast.
Closing Remarks
Myrtle Falls is one of those locations that deserves a place on almost every photographer’s itinerary when visiting Mount Rainier National Park. The short hike, beautiful waterfall, subalpine meadows, and dramatic mountain backdrop make it an outstanding photographic destination.
My September 2025 visit certainly didn’t provide the clear mountain views I had hoped for. However, the unusual lenticular cloud and constantly changing atmosphere gave me an opportunity to create a photograph that I might never have captured under ideal conditions.
If you visit Myrtle Falls, allow yourself plenty of time to explore the viewpoints and watch the changing light and clouds. Even when the mountain is hidden, there may be interesting photographic opportunities waiting for you. Stay on designated trails, protect the fragile meadows, and be particularly careful around the waterfall viewpoint.
Enjoy your time exploring this beautiful part of Mount Rainier National Park!
Happy Travels!
John Freeman, Featured National Park Photographer
Find Your Favorite Location
No matter where you go in Mount Rainier National Park, be sure to take your time and find your favorite location along the way. If you are lucky, you may even spot some wildlife! Don’t forget to add detailed macro shots, change your perspective, and most importantly have fun.
Before making your trip, consider checking the official Mount Rainier National Park website or contacting the park’s visitor center for the most up-to-date information on trail conditions, accessibility, and any recent changes. As with any visit to a national park, it’s important to follow park regulations, practice “Leave No Trace” principles, and prioritize safety while exploring this beautiful area.
Want to learn more about Mount Rainier National Park? Check out these maps, guides & books:
- Tahoma and Its People: A Natural History of Mount Rainier National Park
- National Geographic Trails Illustrated Map #217 — Mount Rainier National Park
- National Geographic Mount Rainier National Park Day Hikes Map
- Day Hiking: Mount Rainier, 2nd Edition
- Hiking Mount Rainier National Park, 5th Edition
- Mount Rainier National Park Adventure Set
Please note, by making purchases through our affiliate links, you are supporting our mission to celebrate and showcase our National Parks and the photographers who frequent them. As an Amazon Associate, National Park Photographer earns from qualifying purchases at no cost to you. We appreciate your support.
References
Want to visit more parks? Check out our complete list of the US National Parks!
Do you want to be featured on National Park Photographer?
Why wait! Contact us today at nationalparkphoto@gmail.com for a chance to be featured as a National Park Photographer!